| Quantity | 3+ units | 10+ units | 30+ units | 50+ units | More |
|---|---|---|---|---|---|
| Price /Unit | $69.89 | $68.47 | $66.33 | $63.47 | Contact US |
 SKYZONE SKY02O (Black) FPV Goggles w/ 5.8G Receiver Head Tracker & 640x400 OLED + 3S 2600MAH Battery
$371.79
 SKYZONE SKY02O (White) FPV Goggles w/ 5.8G Receiver Head Tracker & 640x400 OLED + 3S 2600MAH Battery
$371.79
 SKYZONE SKY02O (Black) FPV Goggles w/ 5.8G Receiver Head Tracker & 640x400 OLED and without Battery
$359.71
1W 48CH 5.8G TX RX FPV Video Transmitter Receiver (with 5.8G FPV Receiver for Cellphone & PC)
Attention:
* The integrated module will be shipped after assembly. If the user disassembles the product, returns are not supported!
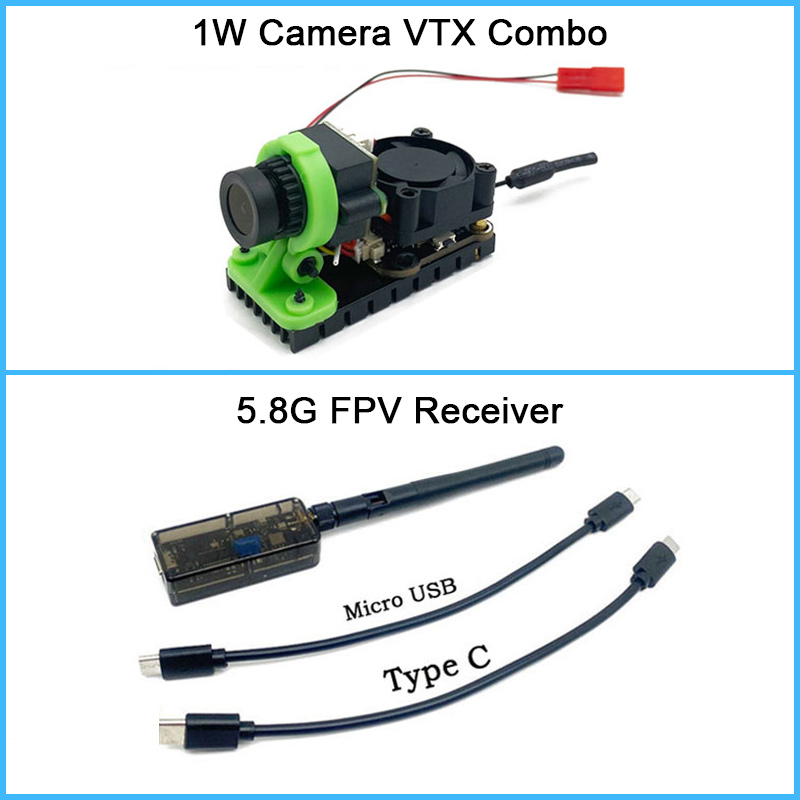
Features of Camera VTX Combo:
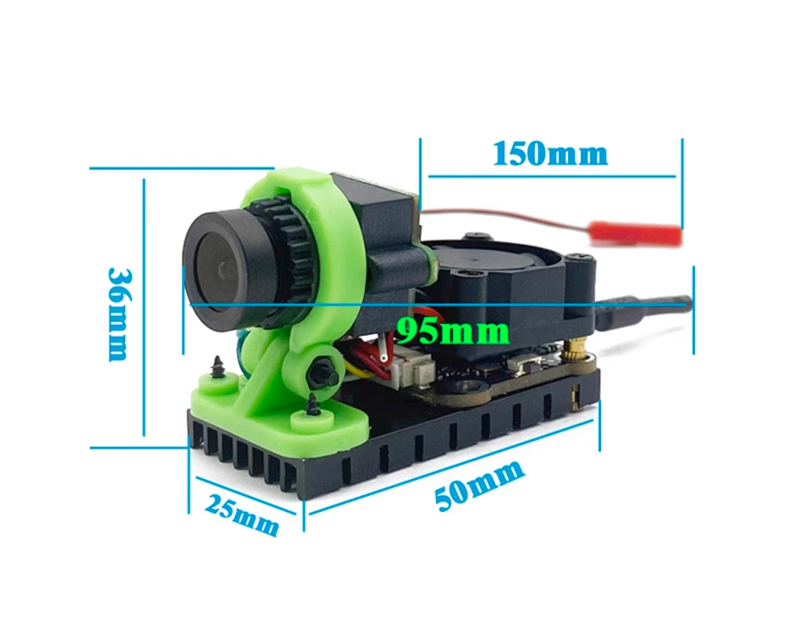
* 48CH 1000mW 5.8G VTX transmitter
* Overheat protection
* Dual heat dissipation makes its performance better
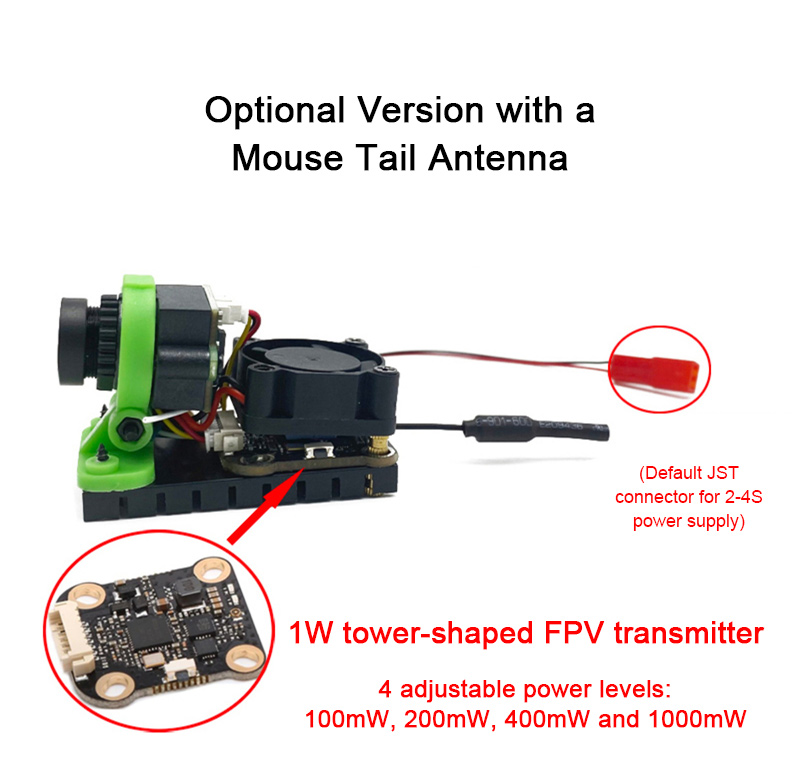
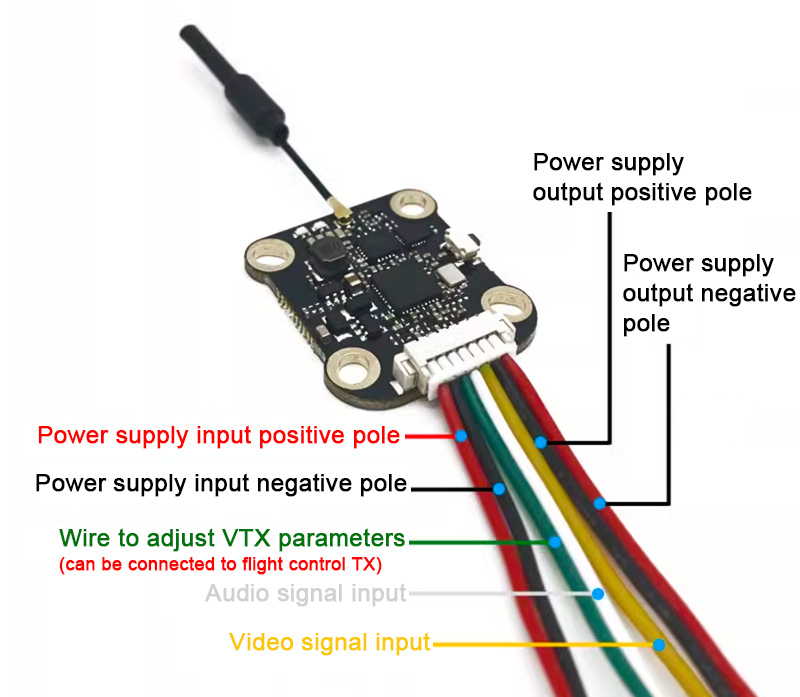
* Powered by 2-4S via JST connector by default
* 4 levels of adjustable power: 100mW, 200mW, 400mW, and 1000mW
* A cooling fan and a heat sink make heat dissipation better and performance better
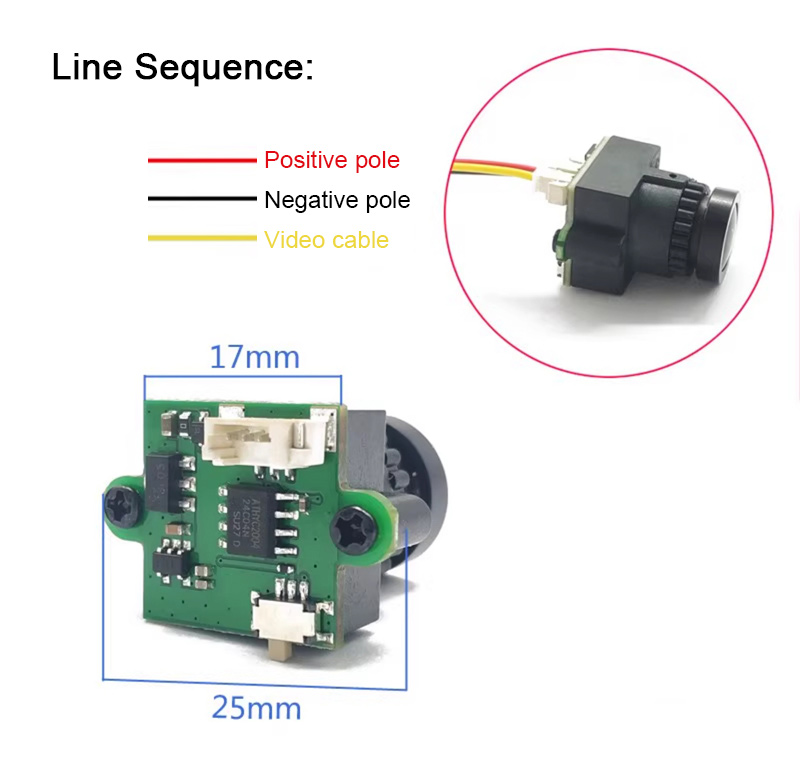
* 1000TVL analog HD
* 2.8mm/100° lens
* Ready to use, no welding required
Voltage and Power:
1000mW video transmitter + camera set supports four levels of adjustable power. Access voltage 7-24V or 2-4S model aircraft battery
Distance:
* The reference distance is 2-5km when there is no interference and no obstruction in the air. The reference distance is 100-1000m when there is no interference and no obstruction on the ground.
* There are many simulated interference factors, and the distance is for reference only. It is subject to actual environmental testing. When it is shipped, we only guarantee that the transmission power is sufficient, and other things are not guaranteed!
Image Transmission Signal:
It is not a WIFI VTX. It does not require WIFI or 4G signals when in use. The VTX directly transmits the signal. Therefore, the temperature of the VTX is high when it is working. Please place it in a ventilated environment before use.
VTX Parameters:
* Working frequency: 5.8G
* Working channel: 48CH
* Adjustable transmitting power: 100mW, 200mW, 400mW and 1000mW
* Working voltage: DC 7-26V
* Working current: 100mW (230mA), 200mW (290mA), 400mW (360mA) and 1000mW (490mA)
Parameters of 1000TVL CMOS Camera:
* Signal system: PAL/NTSC
* Imaging device: 1/3" CMOS
* Effective pixels: 1280 (H) X 720(V)
* Synchronization system: Internal synchronization
* Minimum illumination: 0.05LUX/F1.2
* Horizontal resolution: 1000TVL
* White balance: Automatic
* Automatic gain: Automatic
* Backlight compensation: Automatic
* Digital noise reduction: Yes (2D)
* Gamma correction: 0.45
* Electronic shutter: 1/50~1/100, 000 S for PAL; 1/60~1/100, 000 S for NTSC
* Signal to noise ratio: ≥50dB
* Video output: 1.0Vp-P75Ω
* Operating voltage: DC5V 1000mA
* Operating current: 135±5mA
* Operating temperature: -40℃ to 105℃
5.8G FPV Receiver for Cellphone & PC:
* Resolution: 720*480
* Can be connected to mobile phone and computer
* Can take photos and videos
* 48CH adjustable
* Note: Cannot be connected to external AV screen
Package Included:
* 1 x Integrated Camera VTX with Mouse Tail Antenna
* 1 x 5.8G FPV Receiver
* 1 x Micro USB Cable
* 1 x Type-C Cable
Packaging Details:
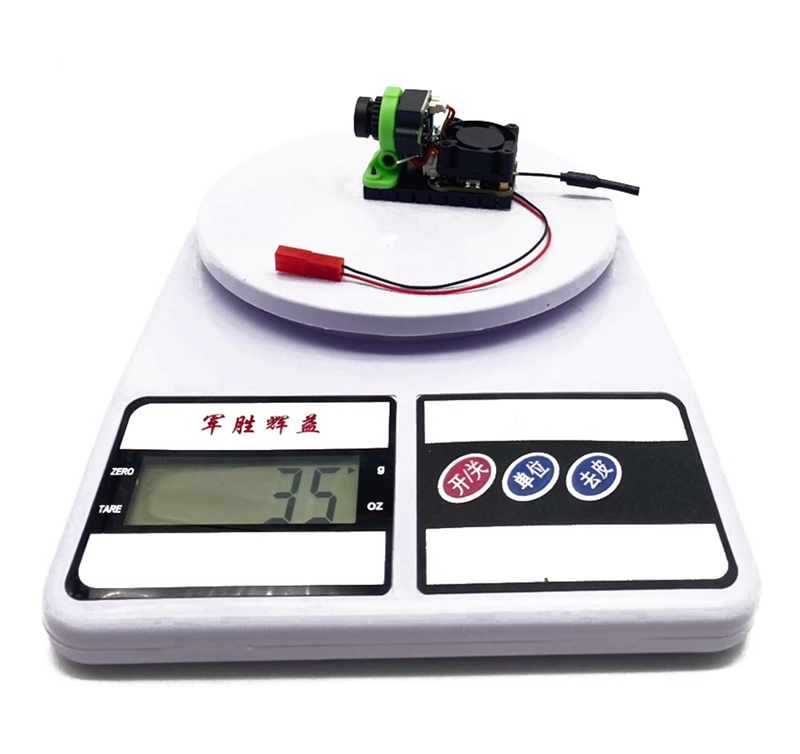
* Weight: 0.45kg
Note:
* Battery for VTX is not included.
* It does not support wall penetration!
* Other items pictured are not included, for demonstration purposes only. Thank you for your understanding!
Button Configuration:
After powering on, press and hold the button to cycle through channel frequency points, channel groups, and power levels. Press and hold the button to switch (red light), short press to switch (blue light), and double press to switch to Pit Mode (blue light).
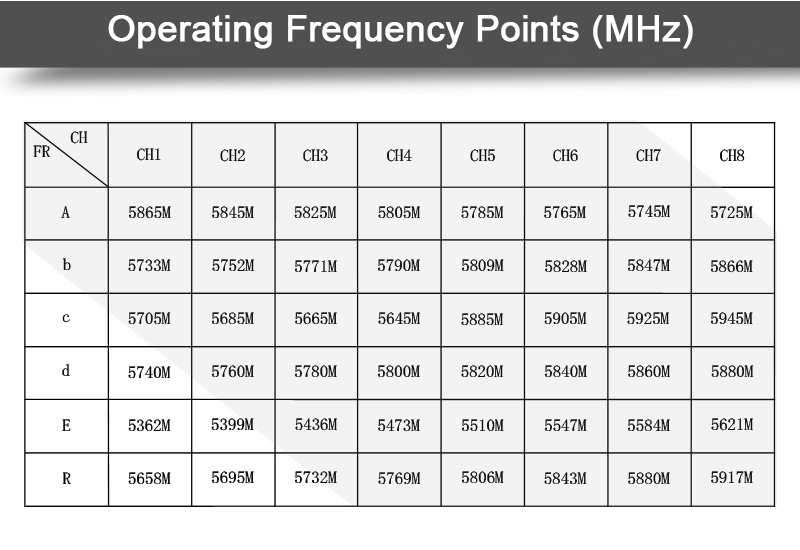
Step 1: Press and hold the button. When the red light flashes once, you can adjust the channel frequency points (1, 2, 3, 4, 5, 6, 7, and 8). At this point, short press the button to switch between frequency points. A single blue flash indicates channel frequency point 1, and multiple blue flashes indicate the corresponding frequency points.
Step 2: Press and hold the button. When the red light flashes twice, you can adjust the channel groups (A, B, C, D, E, and R). At this point, short press the button to switch between channel groups. A single blue flash indicates channel group A, and the number of blue flashes indicates (B, C, D, E, and R) in sequence.
Step 3: Press and hold the button. When the red light flashes three times, you can adjust the power. Short press the button to switch the power levels. A single blue flash indicates 100mW, two flashes indicate 200mW, three flashes indicate 400mW, and four flashes indicate 1000mW.
Step 4: After adjusting the parameters, press and hold the button again. At this point, both the red and blue lights will stay on, indicating that the module has entered parameter saving mode.
Step 5: Quickly double press the button. When the red light stays on and the blue light is off, it indicates that the RF is turned off. Double press again, and when both the red and blue lights stay on, it indicates that the RF is turned on.
Precautions for VTX:
1. When installing the transmitter, ensure there is enough space for proper airflow around the module to ensure heat dissipation. Otherwise, the module will activate overheat protection, reducing power output or even shutting down the transmission.
2. Before powering on, ensure the correct voltage range. Make sure the positive and negative terminals are correctly connected to avoid damaging the components.
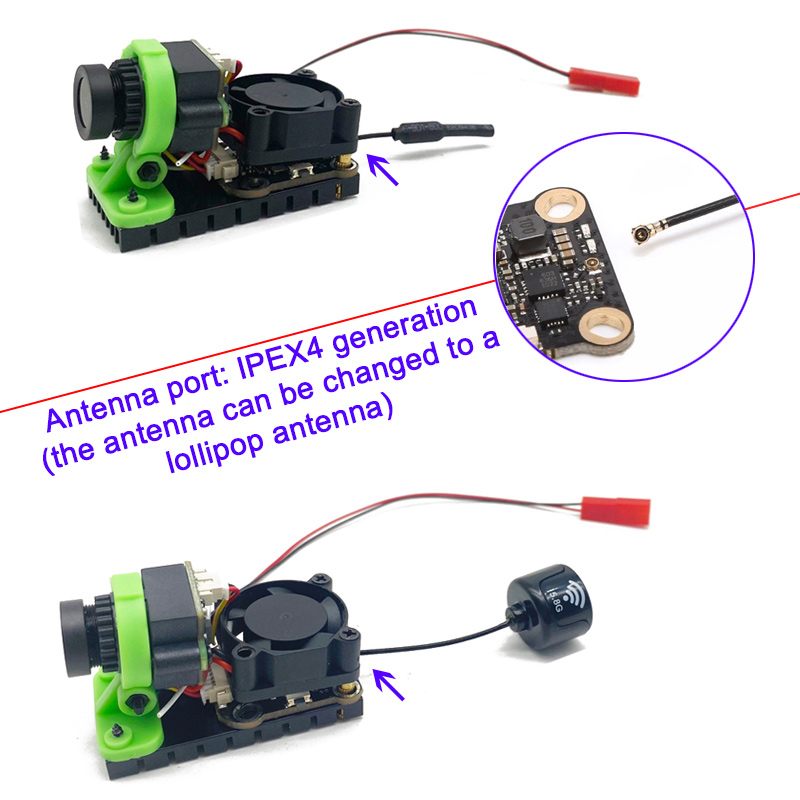
3. Before powering on, ensure the RF output port is connected to an antenna. This will help extend the module's lifespan.
4. Always make sure the wiring is correct to prolong the module's service life.
5. The product comes with a one-year warranty.