| Quantity | 3+ units | 10+ units | 30+ units | 50+ units | More |
|---|---|---|---|---|---|
| Price /Unit | $42.93 | $42.06 | $40.74 | $38.99 | Contact US |
 Chakra Switching Power Purifier (Main Unit + 9V Switching Power Supply) Supports 5-12V Input
$33.54
 HIFI Network Switch (PLL5341) w/ 3 Electrical Ports & 1 Optical Port Requires External 10MHZ Clock
$194.14
 HIFI Network Switch (PLL5381 Version with Built-in OCXO) with 3 Electrical Ports and 1 Optical Port
$188.31
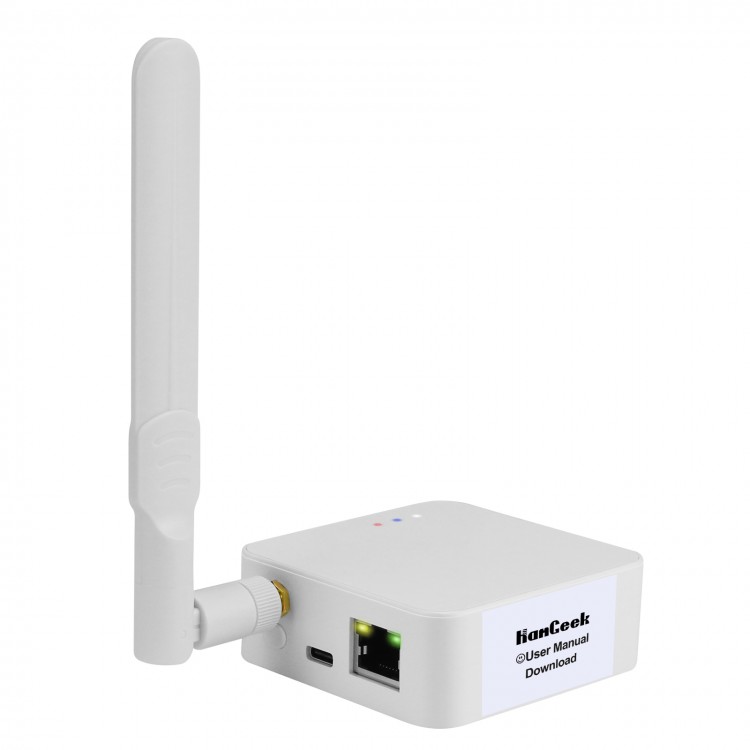
HamGeek HMG-01 Plus POE White Universal ZigBee Gateway ZigBee Coordinator without USB Data Cable
Description:
- Power the HamGeek HMG-01 Plus using USB-C Type or PoE 802.3af
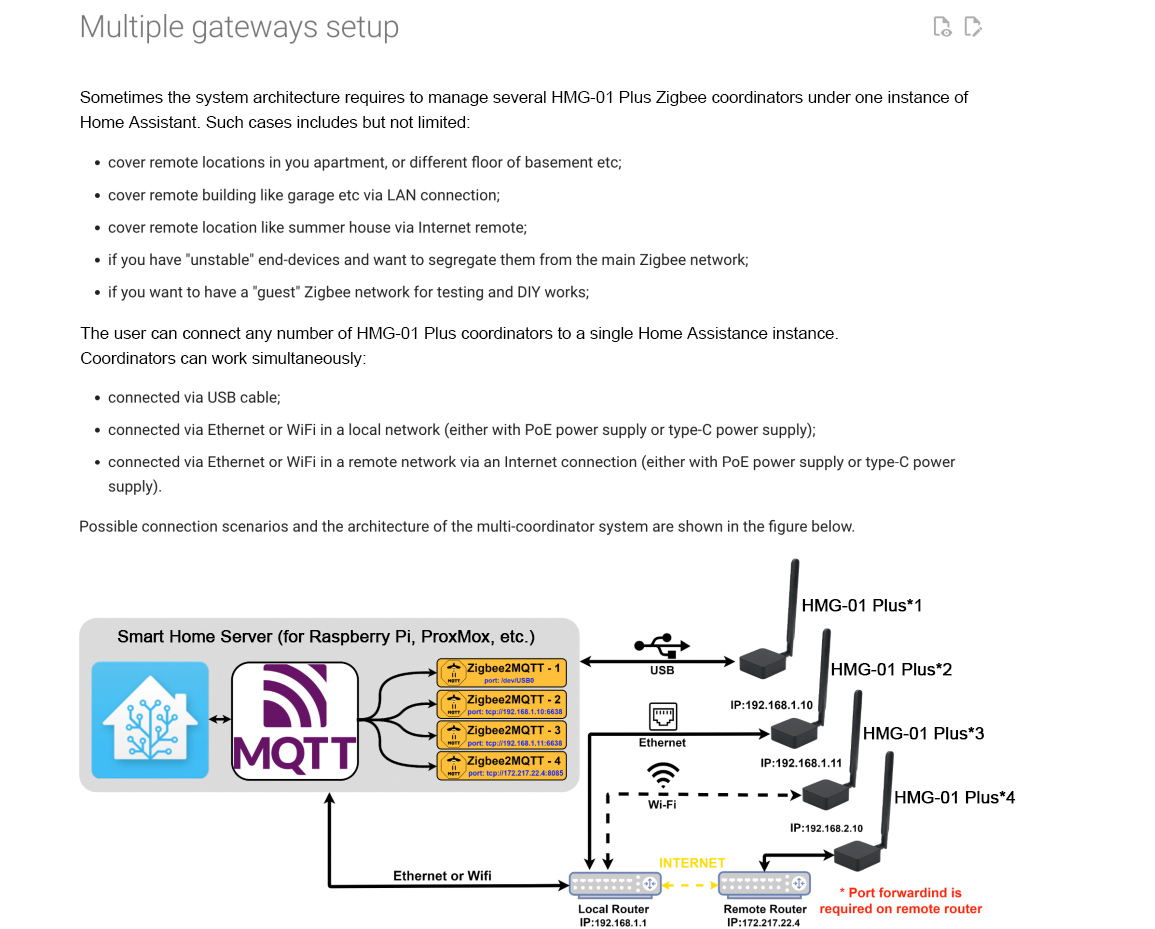
- Zigbee over LAN, USB and WiFi is supported
- Main chips used are ESP32, LAN8720 and CH340C
- CC2652P2 for TI with +20db amplifier incorporated. NEW CC2652P7 is used in hardware revision v0.2+
- CC2652P7 for TI is used in all new hardware starting from v0.2+. Support of up to 300 Zigbee Devices
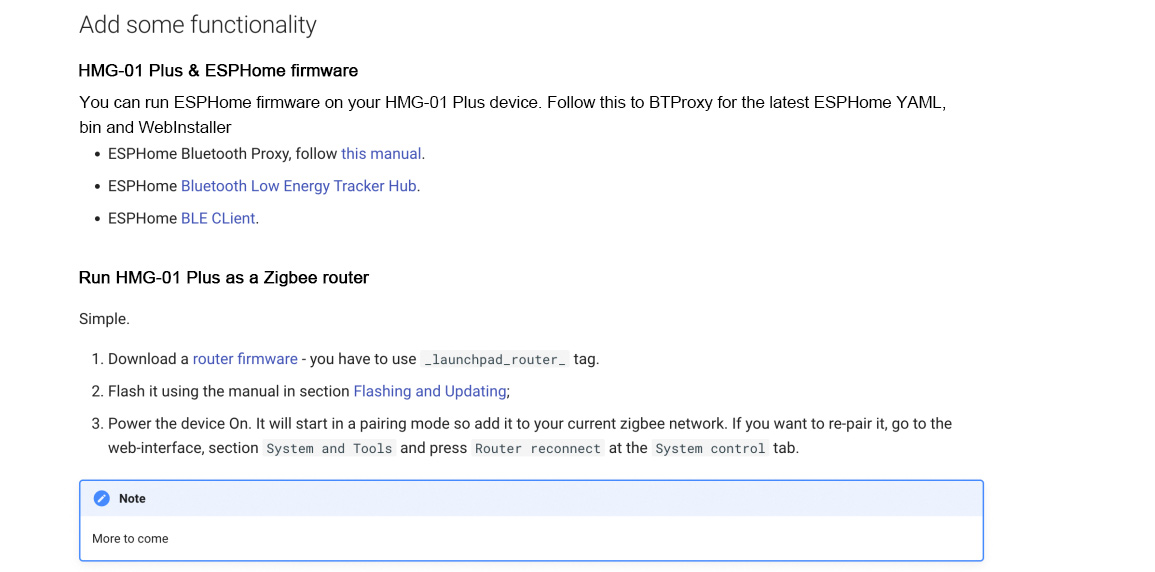
- It supports both Coordinator and Router modes
- 3 LEDs on HamGeek HMG-01 Plus enable user feedback and alerts. BLUE: Power Indication. RED: Working Mode USB/LABLUE. YELLOW: Z2M Connection
- DIY Pinouts are available
- Change working modes with just a button press. Single Press: Change between USB/LAN Mode. Hold (2-4 sec): Control LED's ON/OFF. Hold (4-8 sec): Activate Flashing Mode. Hold (10+ sec) on power up will RESET device
- Update ESP32 & CC2652P firmware over LAN/Internet/USB
- Security authentification
- Open Source Firmware
- Compact shape: 73x72x27mm
- Plug & Play, comes pre-flashed
Getting Started:
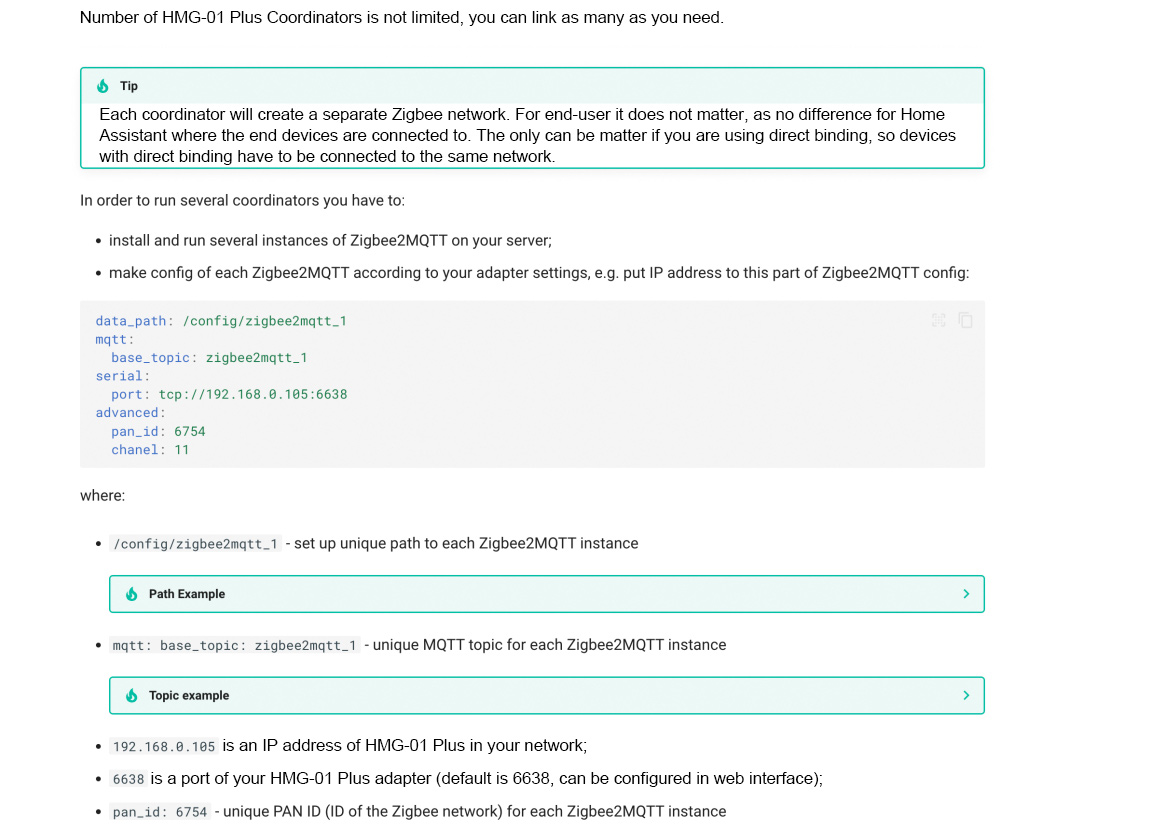
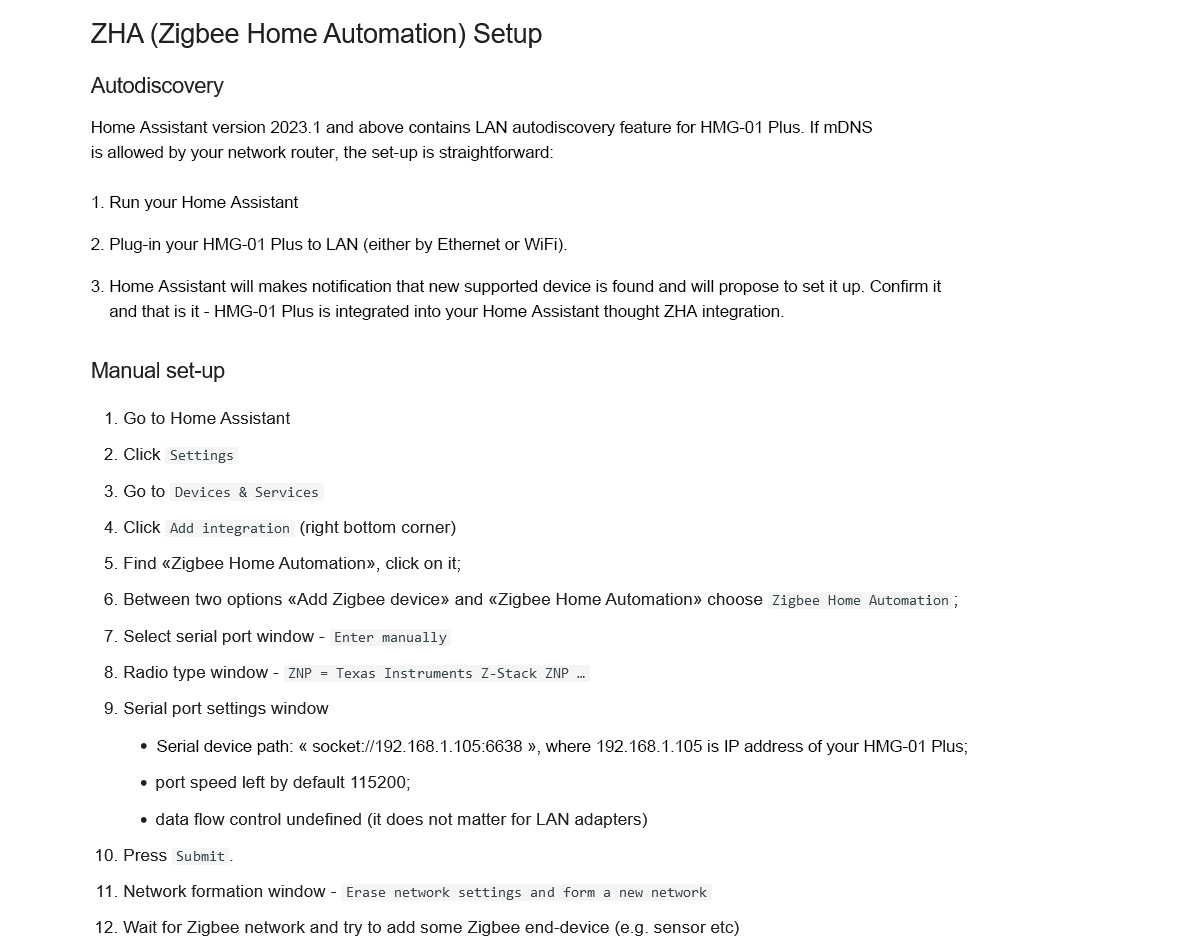
HamGeek HMG-01 Plus is functioning as a Zigbee adapter, facilitating the transmission of Zigbee packets over Ethernet, WiFi, or Serial (USB) connections. The Zigbee adapter permits the integration of devices from various manufacturers (here is a list of supported devices for reference: https://www.zigbee2mqtt.io/supported-devices/) into a unified system. To effectively utilize the HMG-01 Plus, it is essential to possess both a Home Assistant instance and ZigBee2Mqtt.
Package Included:
- 1 x HMG-01 Plus Zigbee Ethernet POE USB WiFi Adapter
- 1 x 3dB Antenna
Powering the device:
- The device can be powered either via Power over Ethernet (PoE) using an Ethernet cable or through a Type-C plug.
-
Tip: HMG-01 Plus has optoelectronic isolation, so can be connected to
USB port of your PC and at the same time to Ethernet/PoE cable!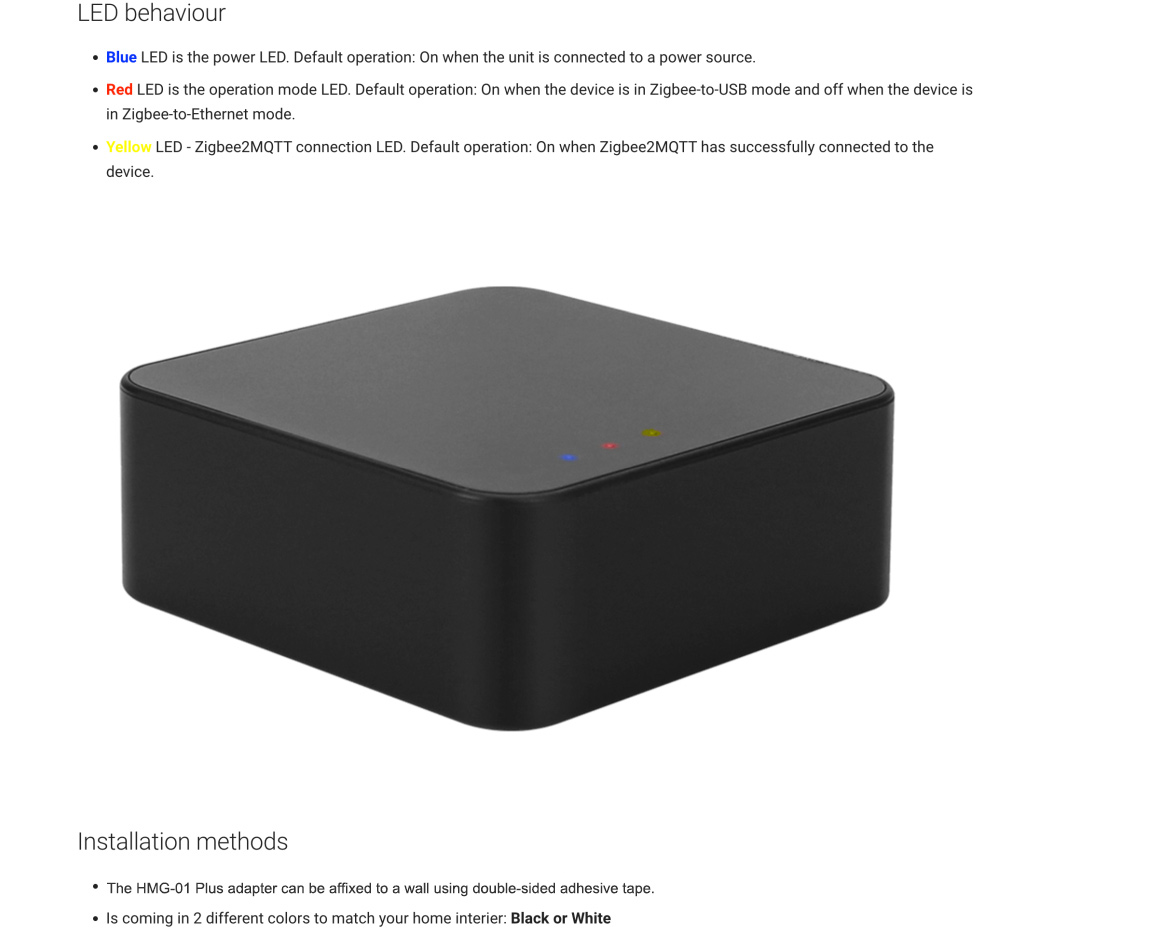
Installation:
You
can use HMG-01 Plus either as Zigbee to Ethernet adapter or as Zigbee
to USB adapter. Depending on the type you are going to use, you can
connect you device.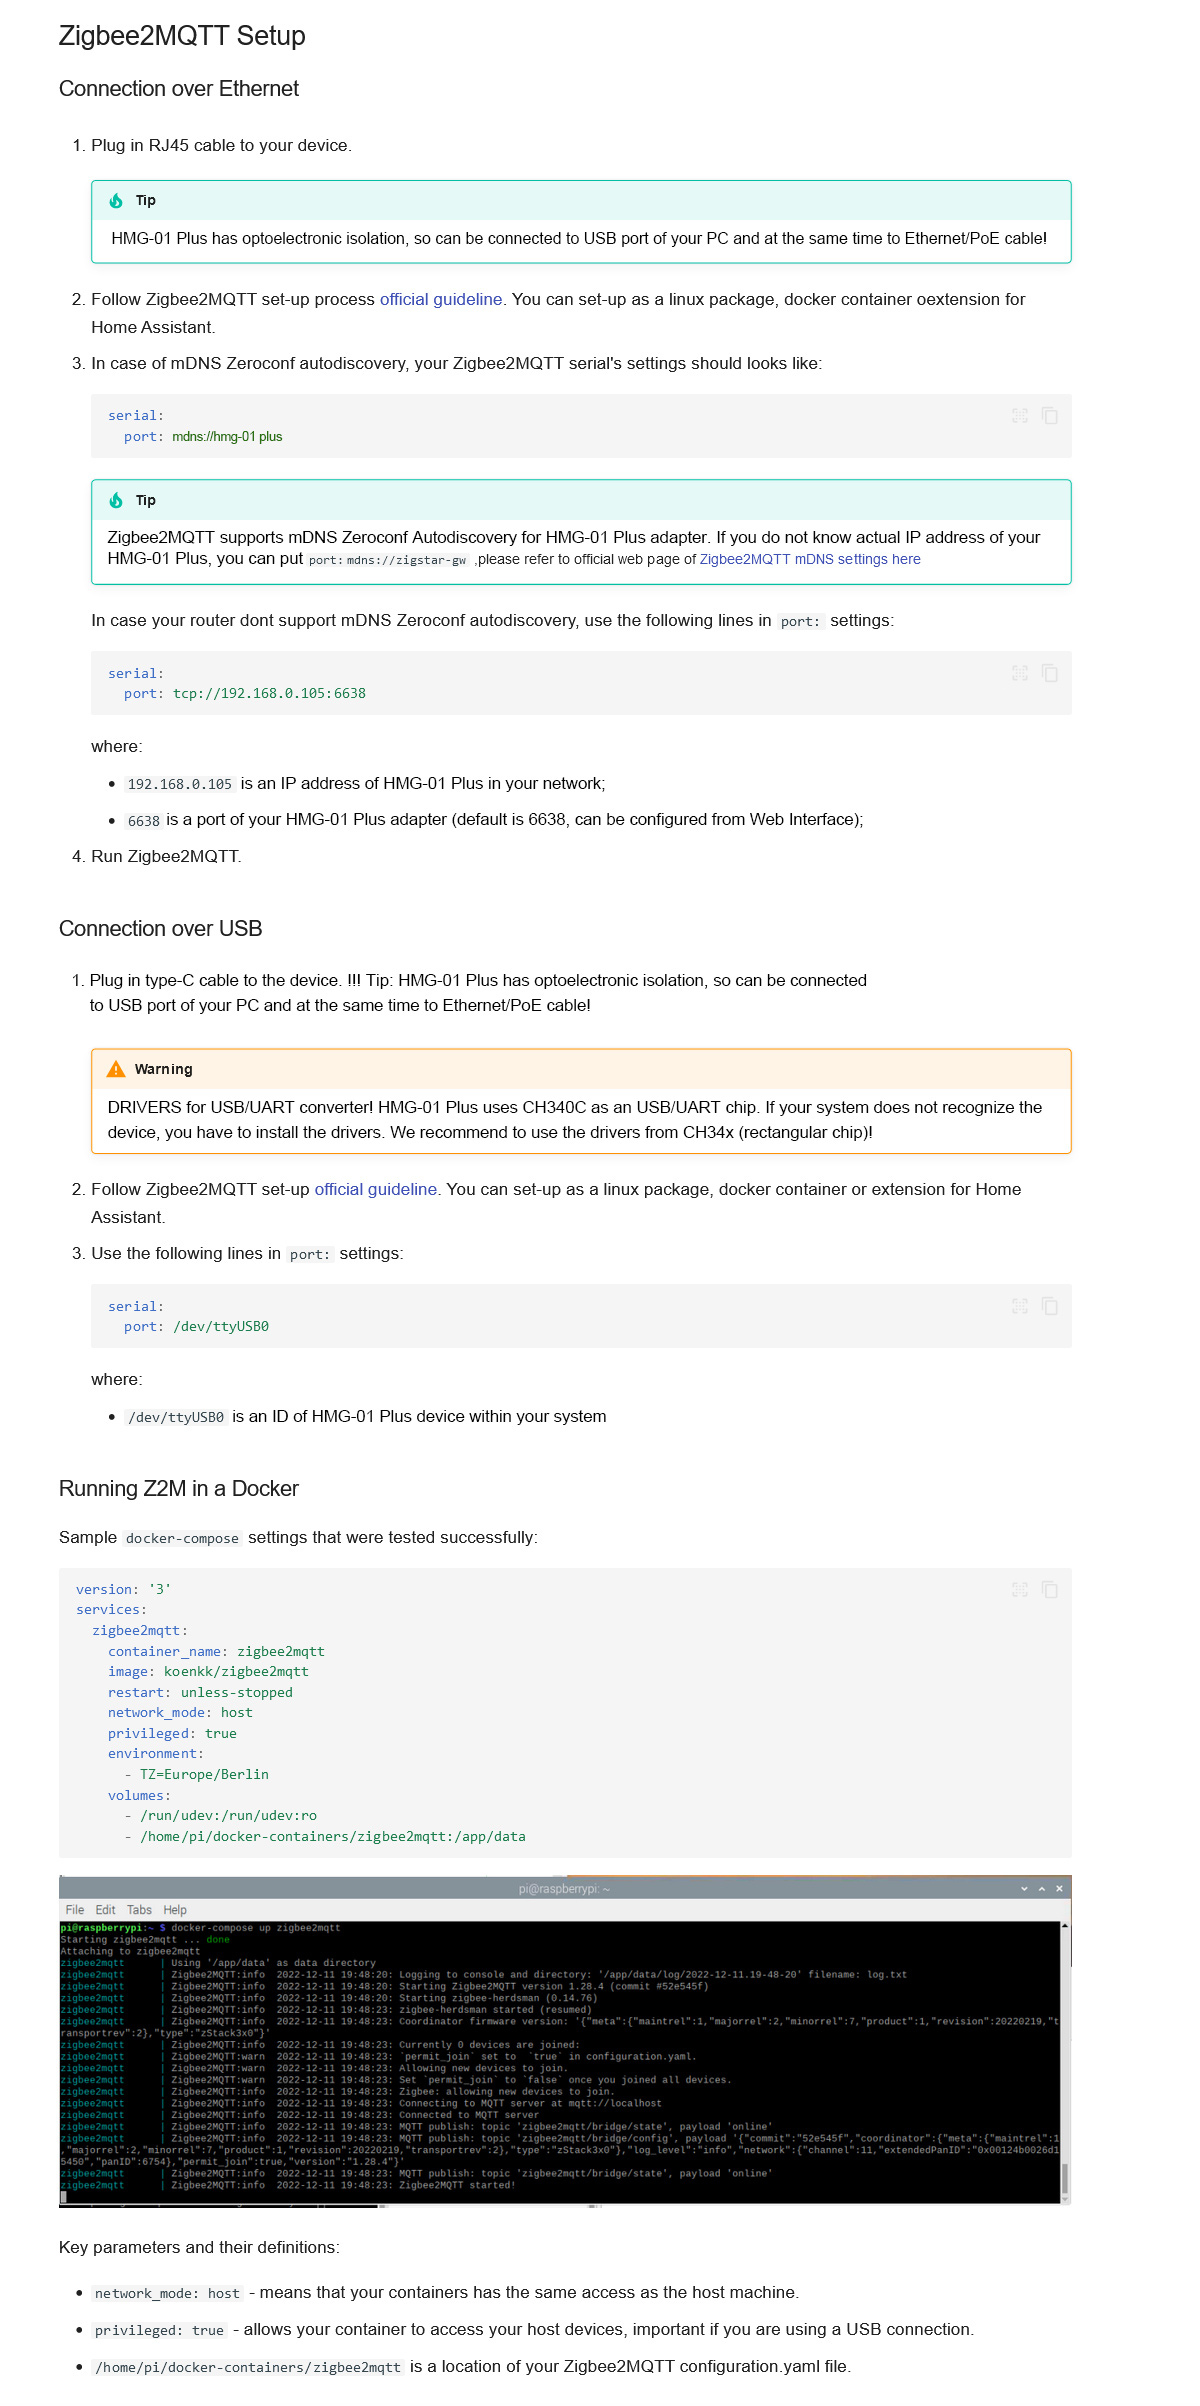
Configuration:
The HMG-01 Plus adapter can be configured either via a physical button or via the web interface.
Configuring with Web-interface:
-
To configure the operation via the web interface, connect the device to
your LAN network and enter the IP address of the device in the browser
of your laptop or phone.
- Tip: HMG-01 Plus adapter supports mDNS. If
you do not know the adapter's IP address - just go to the address
HMG-01 Plus.local in your browser (will work if your router supports
mDNS)
Main parameters of the web interface:
· "Status" - the current status of the device; no settings are available.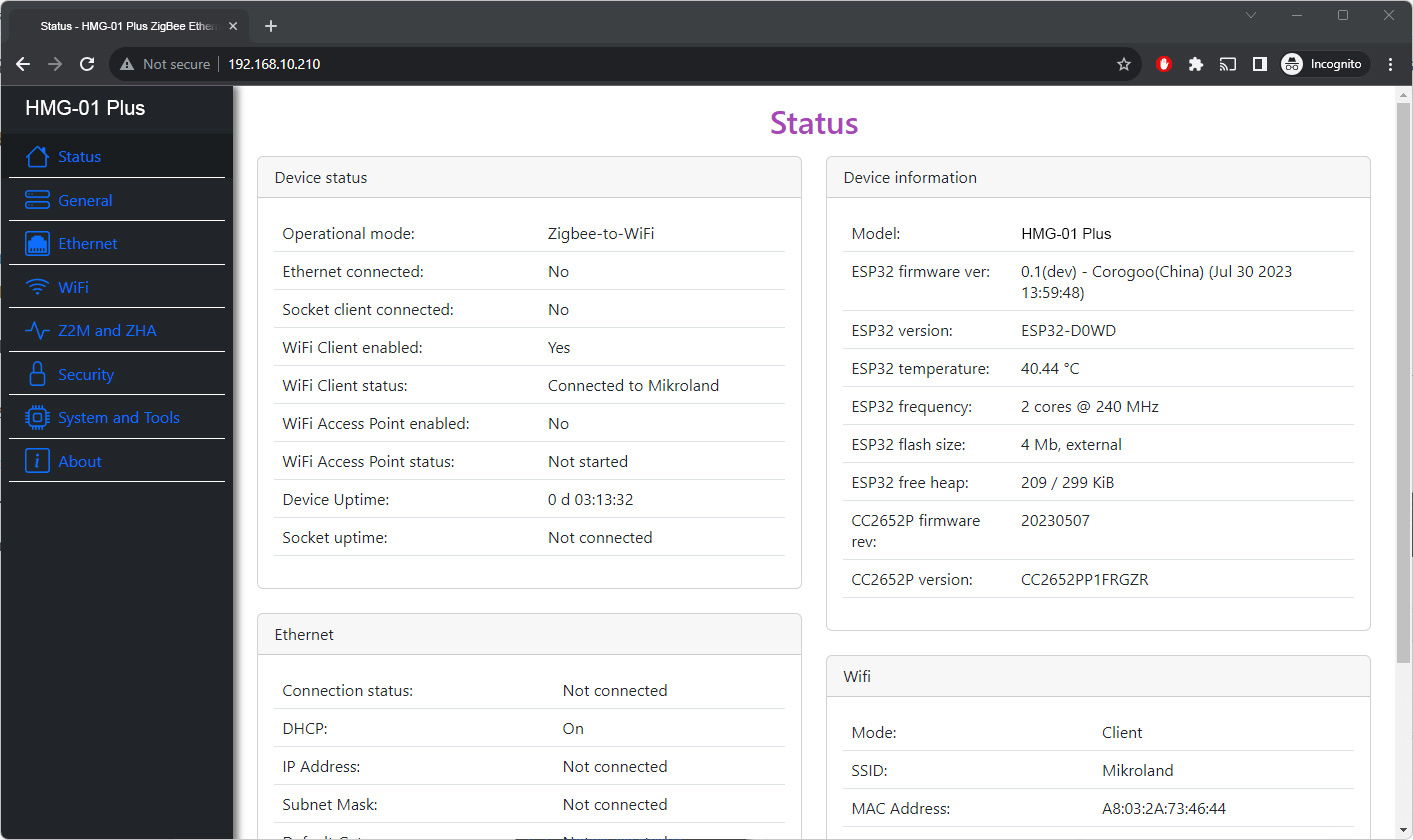
· "General" - Setting the device operation mode, LED operation mode, disable LED.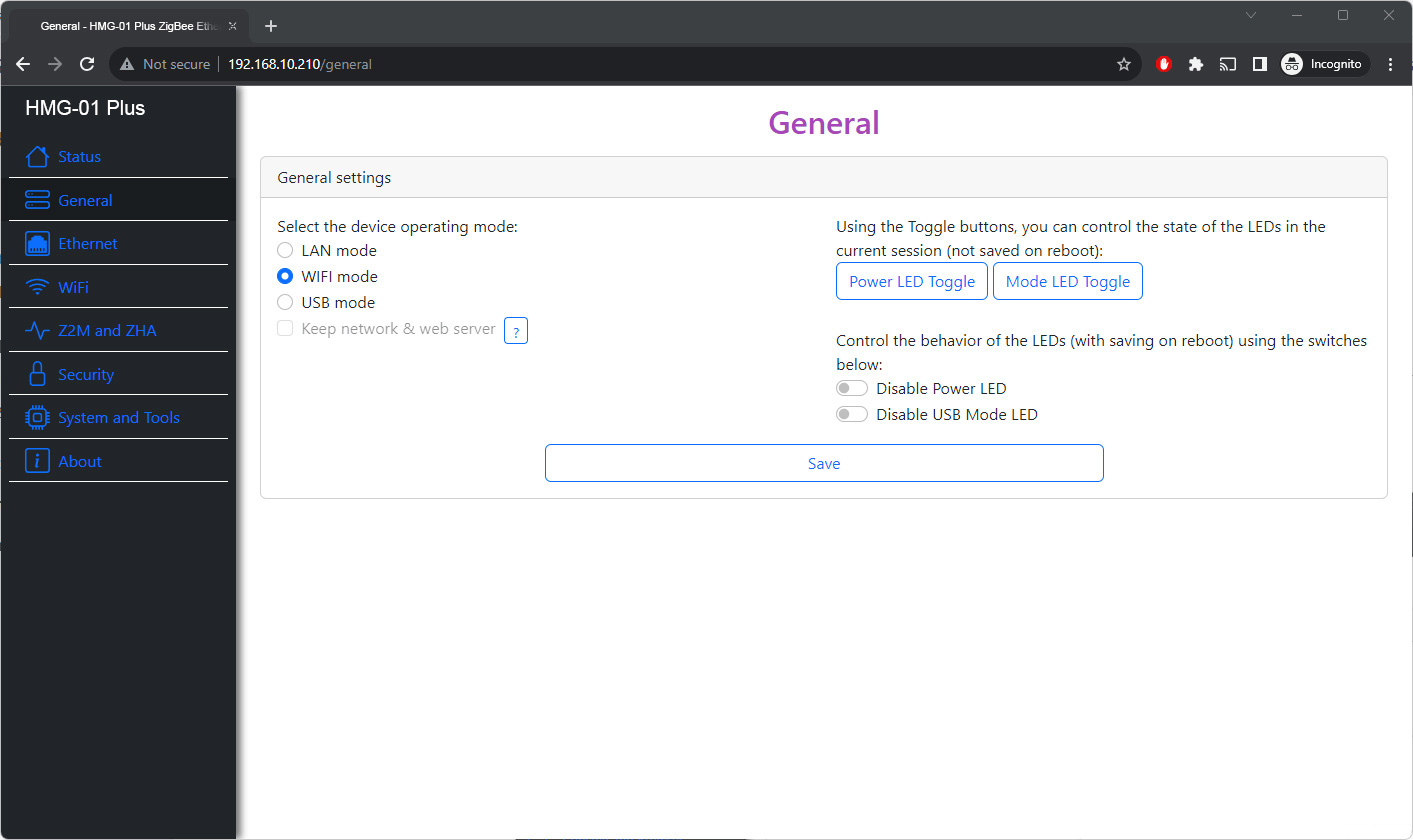
· "Ethernet" - Ethernet settings (DHCP, IP address, etc.)
· "WiFi" - Setting up access via WiFi.
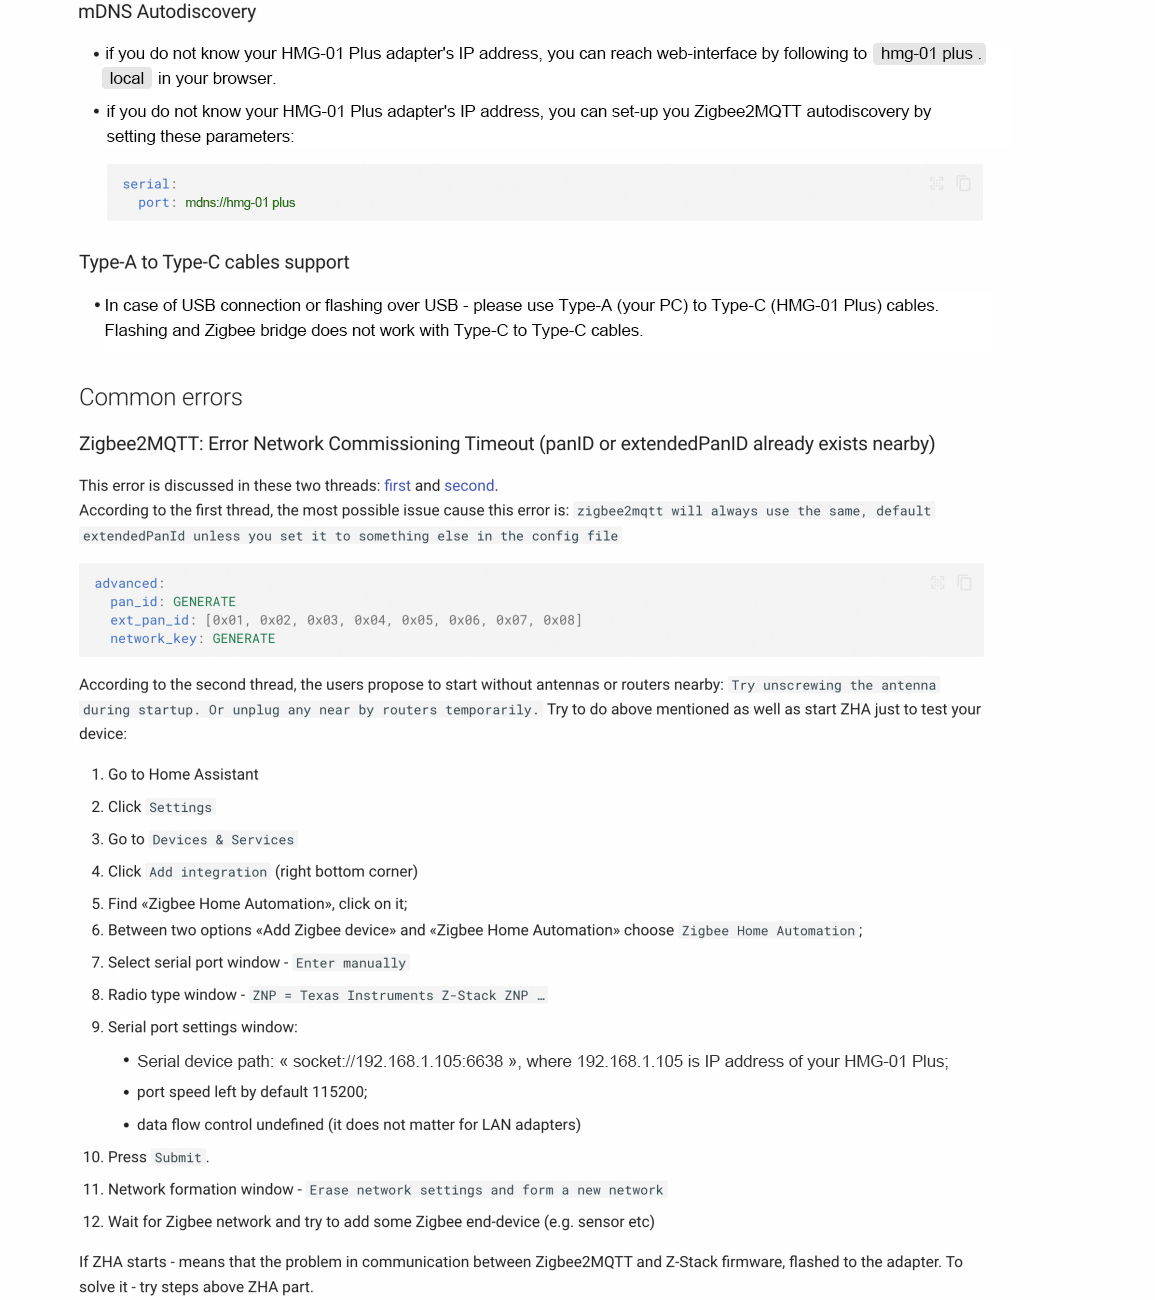
· "Z2M & ZHA" - Setting up access via Serial interface, configuration generator.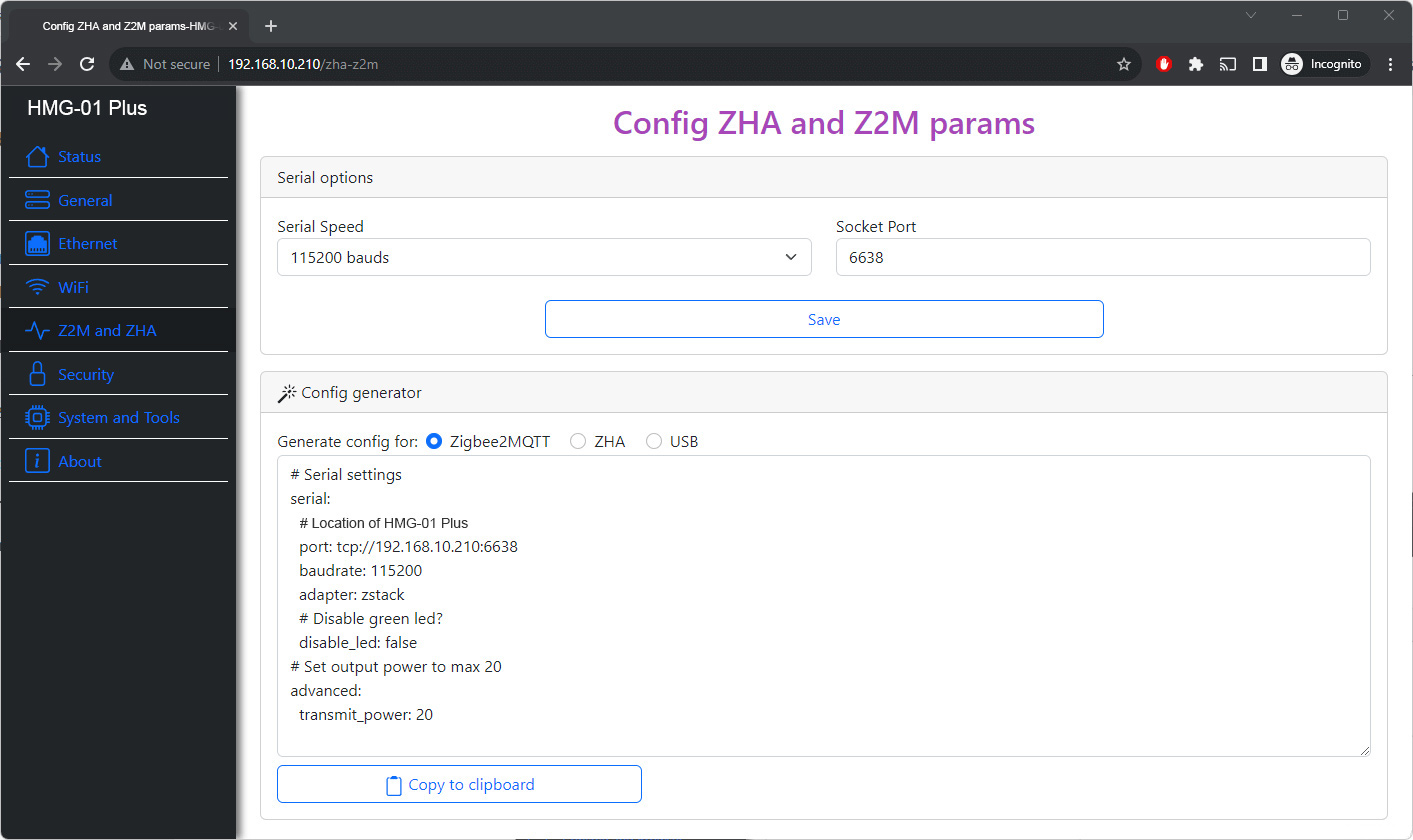
· "Security" - Setting security parameters, such as login, disabling the web interface, IP whitelist.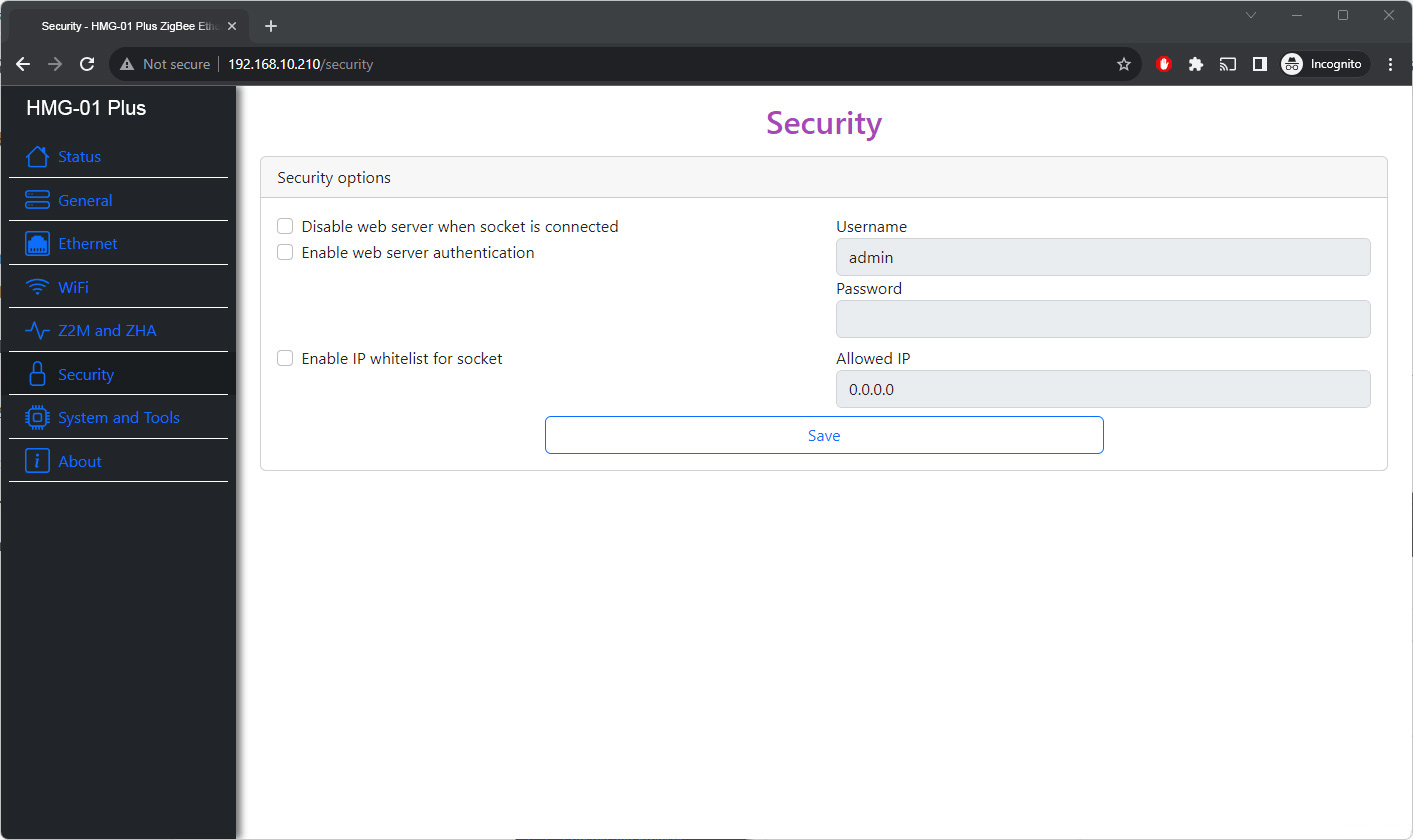
· "System & Tools - General system features such as over-the-air updates, rebooting ESP32 and CC2652P, hostname.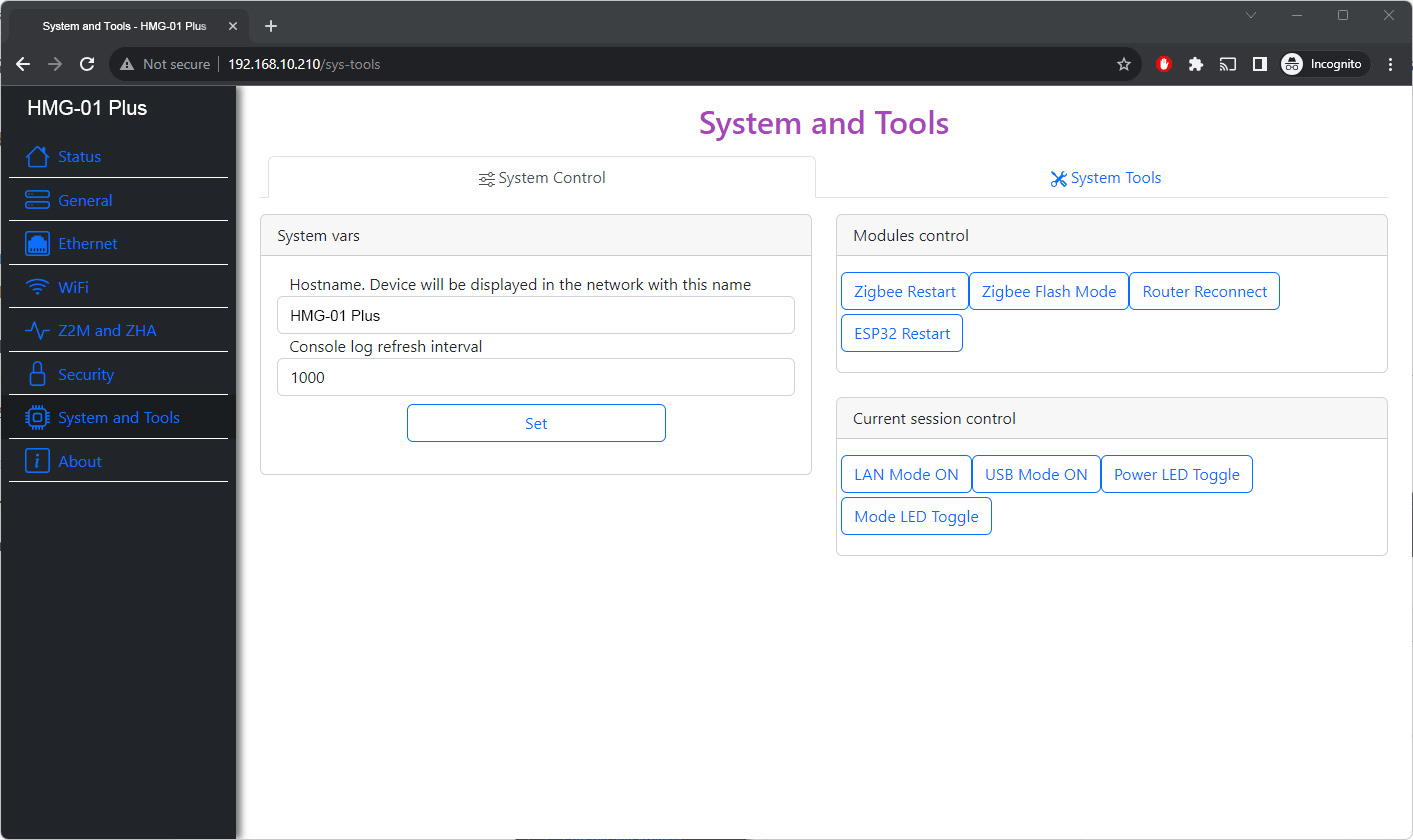
· "About" - Here you can open ticket,get access to manual, last firmware, open an issue on Github.
Configuring with Button:
Using the physical button, the following settings are possible:
1. Operating mode: Change from Zigbee-to-Ethernet to Zigbee-to-USB and vice versa with short press of the button.
2.
LEDs Behavior: Long press (2-4 sec) - turns off the LEDs, another long
press(2-4 sec) - switches the LEDs to the default operating mode.
3. Enabling Flashing Mode: Long press(4-10 sec) will enable Flashing mode, this should be used in USB mode for fast flashing.
Tip: Button controls LED with rebooting. You can toggle LEDs without rebooting via web-interface (see System and Tools)
Reset to factory defaults:
Follow next procedure:
1. Switch off HMG-01 Plus
2. Hold Button pressed during power up for 10+ seconds
3. You device is reset to factory defaults