| Quantity | 3+ units | 10+ units | 30+ units | 50+ units | More |
|---|---|---|---|---|---|
| Price /Unit | $545.24 | $534.12 | $517.42 | $495.17 | Contact US |
 1PCS 1.3GHz Bandpass Filter High Quality FPV Accessory for V2 FPV Racing Drone Receiver
$12.63
 MR72 40-Meter 77GHz UAV Obstacle Avoidance Radar Module Millimeter Wave Radar without CAN Box (UART Interface)
$259.48
 MR72 40-Meter 77GHz UAV Obstacle Avoidance Radar Module Millimeter Wave Radar without CAN Box (CAN Interface)
$259.48
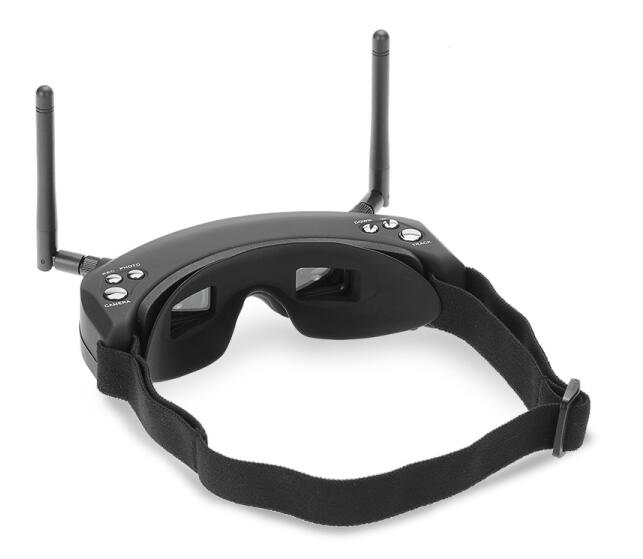
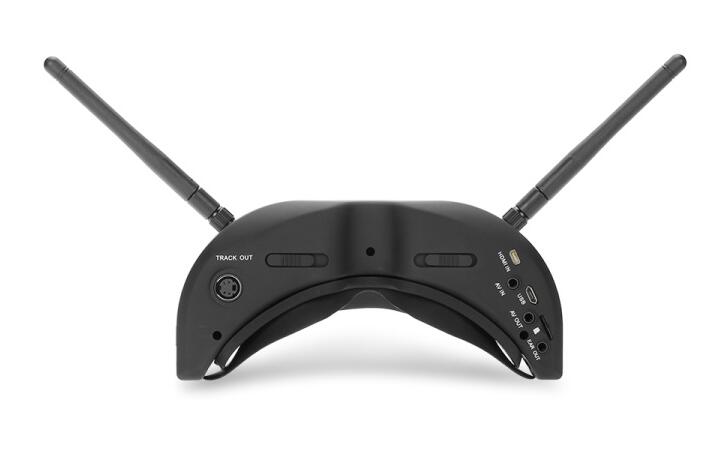
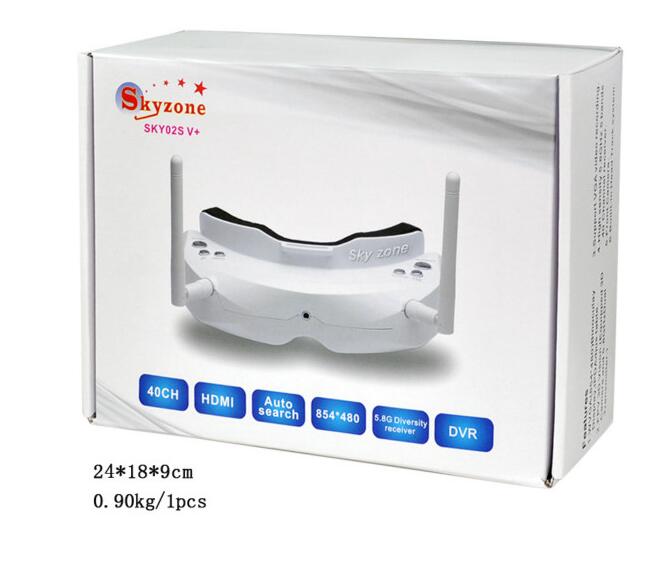
SKY02S V+5.8G Video Glasses 48 Channel Dual Receiver Image HDMI FPV GOGGLE Aeromodel Set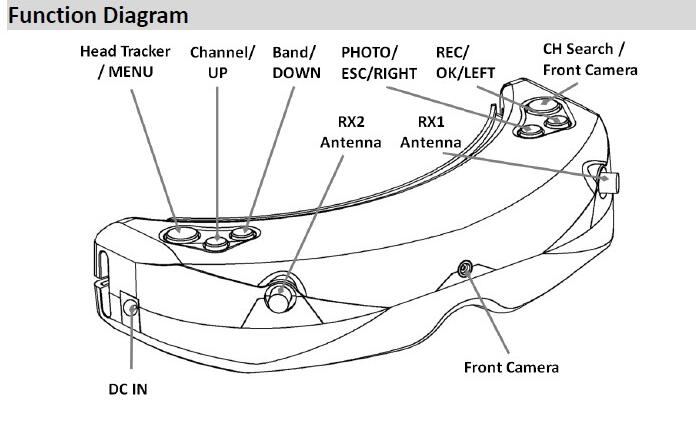

Product Description:
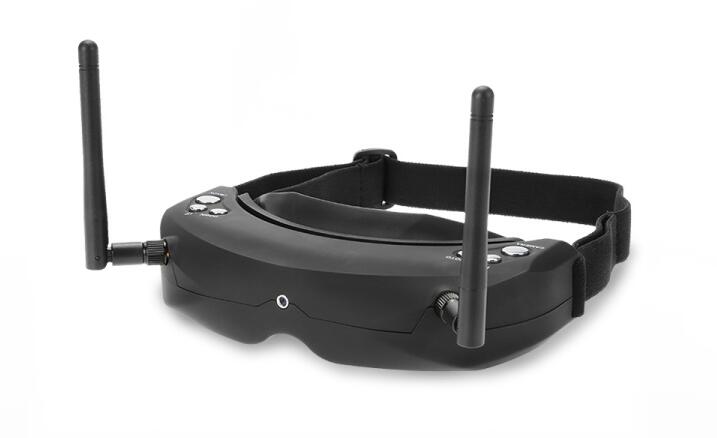
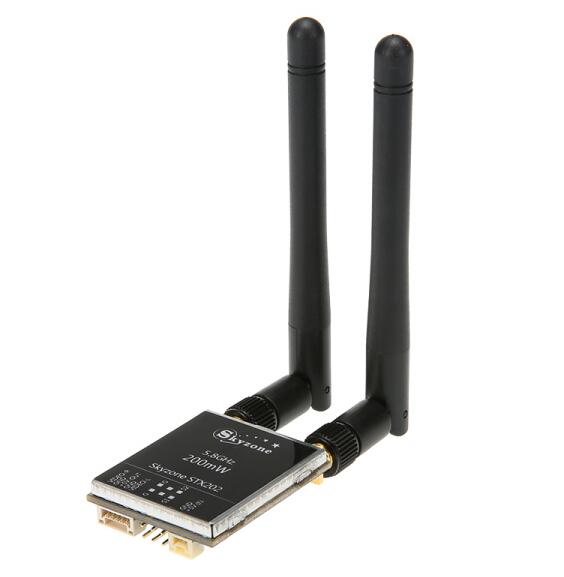
- SKY02S V+ Video glasses built-in 5.8G diversity receiver,two separate video display module can bring you 3D sensory experence.3D camera SCAM302 and dual transmitter STX202.
The two lens 3D camera uses parallel shooting method,bringing you 3D viewing near scenes
and far scenes and vivid visual experience .
- The FPV glasses built-in two 5.8GHz receiver modules,two antenna port and two independent-working display modules realize 3D visual FPV flying experence.
In this mode,you should equip with 3D camera SKY301 and dual tranmitter STX202.
The two lens for 3D camera uses parallel method shooting. The stereo feeling enhances while you shoot the near scenes.The stereo feeling decreases while you shoot far scences.But the whole will be presented with a more vivid viewing experience.
Quick start
Preparation:
Install lenses,eyeshade,antenna and memory card for the FPV glasses.
Connect the lens and the tranmitter well.The transmitter current is switched on.
Set the working channel,the FPV glasses is connected to the power supplies.
Short press the button to adjust the channels keeping in line with the transmitter.
Then you can view the images taken by the camera.
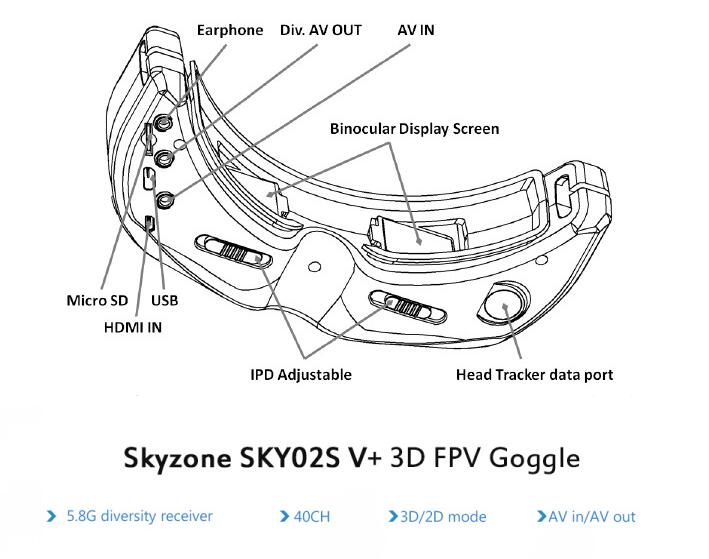
Pull the IPD Adjuster to adjust the interpupillary distance.
Button function (The button function for playback mode,please refer to the “Playback”section description)
TRACK Button:
In the normal mode,short press is "Head Tracker Reset function"
Long press MENU button for three seconds,you can step into menu setting status.
In MENU status, switch four main menus with the button.
Channel Button:
In 3D RF mode,short press is channel+ button.
In 2D RF mode,short press is channel button,you can press it many times to circularly regulate channel.
In 3D RF,2D RF,AV IN,PLAYBACK mode,long press for three seconds,you can adjust the volume+.
In MENU status,it is upward selection.
BAND Button:
In 3D RF mode,short press is the channel- button.
In 2D RF mode,short press is the waveband button.You can press it many times to circularly regulate waveband.
In 3D RF,2D RF,AV IN,PLAYBACK mode,long press for three seconds,you can adjust volume-.
In MENU status,it is downward selection.
REC Button:
In 3D RF,2D RF,AV IN mode,You can revord video with short press.Short press again,you can stop video recording.
In MENU status,it is the OK button.
Photo Button:
In 3D RF,2D RF,AV IN mode Video Preview status,short press,you can take photos.
In MENU status,it is exit button.
Camera Button:
In any mode,you can short press CAMERA button to switch into Front Camera mode.
In 3D RF mode,long press for three seconds,you can carry out fast 2D switching.
RF mode
3D mode
3D mode only takes effect in RF mode,It automatically switch into 2D diaplay in other mode
The default channel configuration is four.You can adjust channel through button,you can also
set the RF Band "custom" in the menu.Then,choose the right band and adjust the right channel. (Please uses custom with caution.If the frequency interval is too near,they will influenceeach other. We suggest that the frequency interval is about 40MHz.
Long press button,you can fast switch to 2D display mode (When serious environmental interference occures,it can quickly improve the effect avoiding that the two eyes viewing image is not the same.In that mode,the wireless channel will not change.This is different from the 2D mode after swithing off 3d mode.In fast 2D mode,the default signal source is RX1 channel and you can change the setting in the menu.
2D mode
If you do not use 3D mode,you can switch off 3D mode in the menu.It operates in diversity receive mode at this time.The other function setting items can not work that are in the menu 3D mode item below.
Press the button,you can adjust channels and can adjust waveband,press button many times,you can circulating operation.
Front Camera
The FPV glasses front camera has VGA resolution and fine low illumination characteristica.
You can easily ovserve the surrounding with this function no needing to take off the FPV glasses.
In any mode,you can fast open the front camera with pressing the button.
Front Camera merely designs for temporary viewing to watch the surrounding.It can not record the image to the memory card,nor outputs the image through AV OUT.If you open the front camera in recorded condition,it does not affect the recorded image. You can normally switch mode in Front Camera open condition.
Image adjustment
You can set the image brightness,contrast,saturation,hue and sharpness parameters in the image setting and menu setting to get personalized display effect.
Press the button in the to-be-set function button and you will go to the setting status.
Press the button to adjust the size and the image will display the real-time regulating effect.
Press the button to go back to the last menu.
You are suggested to set these parameters in the clearer image status.
Head Tracker
The head tracking function needs a initialization time.Please let the product horizontal position and stable,when you plug on the power. When you hear the beep,the initialization is done and you can use the head tracking function.Or you can use the machine normally
when the machine maintains stable tatus and after the short press.
Short press button,you can reset the PPM signal to the central position and send out a warning tone.
You can set the PPM channel in the menu:CH5-CH6,CH5-CH7,CH5-CH8,CH6-CH7,CH6-CH8,CH7-CH8.
Pan Tracking range:180 degree (The left and right are both 90 degree );120 degree (The left and right are both 60 degree);90 degree (The left and right are both 45 degree)default 90 degree.
Tilt Tracking range:120 degree (The up and down down are both 60 degree);90 degree (The up and down down are both 40 degree);60 degree (The up and down down are both 30 degree) default 90 degree.
Pan Correction:You can separately compensate Pan center offset through this setting.0~10 grades can be set.The real compensate angle is related to the PTZ rotation angle.
Tilt Correction:You can separately compensate Tilt center offset through this setting.0~10 grades can be set.The real compensate angle is related to the PTZ rotation angle.
Recording
We suggest that you can conduct formatting operations for memory card before you pluging It. (You can refer to the Format SD card description part)
You can both use video recording function in RF Mode and AV in Mode.In normal condition,the screen will diplay <> and <memory card capacity information>,you can press the button to start recording.After you starting the recording,<> displays red and start to record the recording time.
In preview status,you can also press the button to take photos and send out a warning tone.
(You can not take photos durning video recording.)
Recording video includes sound in default condition,you can switch off the"sound recording"function in the sytem menu.It merely records video signal.
You can also switch off the whole video recording module to save electrical power.
Playback
Playback mode button function:
In RF mode or AV IN mode,long pres the button,you can go to the playback mode.
(Please not connect the AV IN wire in playback mode.)
· REC <play/suspend/OK>button
· PHOTO <stop/return>button
· BAND <last /fast backward>button
· CHANNEL <next/fast forward>button
· TRACK <delete>button
In playback mode,you will directly preview the video image or pictures in the memory card.
The top right corner displays the latter four numbers for the file name.
If it is video file,it will diplay the recording time below the file name.
You can press <fast backward/fast backward> button to do 2X,4X,8X fast play durning the video playing and you can press <play>button to return to the normal speed.
The image stays in the first frame for the file after the play is done.You need to press <stop>
button to return to the preview status,conduct other operation or play again.
If you want to delete some file while you are scanning the files in the memory card.You need to press <delete>button when you scan the file.The menu will pop up and you will delete the present file with button press.
The machine may not recognise the other files except the machine taking or decording files.
AV input
The goggles support AV IN. The wireless model will close when the AV IN is connected to save power.
If you want to conduct playback,please pull out the AV IN plug and do not plug in AV IN plug durning playback.(If you force it like this,you will automatically sign out playback mode.)
AV output
AV Out is the diversity Video and Audio output
Earphone port is audio output for connecting earphones,Each boot is automatically set to the lowest volume to avoid sudden loud boot。
Format SD card
You step into the system menu,choose Format SD card option,press the button to go to the setting mode.Press button and choose < YES>,press button again and you will perform formatting operations.Handle wirth care! After formatting,you will delete all the files in the memory card.
Factory settings
You step into the system menu,choose Factory settings option,press the button to go to the setting mode.Press the button<YES>,Press the button again to recovery menu all the function setting to factury default tatus.
Screen OSD Overview
Recording icon:It displays natural colour in normal condition.It display red durning recording.If it can not record because of some causes:such as,the recording module is switched off,the memory card is full or the memory card is fault.It causes the condition that we can not start the recording,It will display red.
Taking photos:Press the button once in video preview status.It will diplay red photo icon once,meaning that you take a photo.
Memory card icon:It displays natural colour in normal condition,the latter is capacity information and it is on GMB (1000MB) as a unit.When the memory card is full,It displays red icon.
Mode icon:RF mode,AV IN mode, PLAYBACK mode.
Mode:You can uses 3D display mode only in RF mode.
Mode:Start fast 2D diplay in 3D mode and it display the icon,meanwhile the simultaneous displayed signal source is RX1 or RX2 in this mode.
Mode:When you switch off 3D mode or it displays this icon in AV IN,PLAYBACK,Front Camera mode.
Mode:When the machine connects to PC,it displays the icon.You can manage the memory card content through PC operation in this mode.(You can perform PC port playback,copy and delete.)
/ play/suspend icon
/fast backward/fast forkward icon,the icon behind is the corresponding speed when you perform fast backward/fast forkward operation.
Power supply icon:If you do not need the machine to monitor the voltage for power supply,you set it DC IN power supply method and the screen displays icon.If you use battery for power supply,you can set the voltage range for battery.The optional range:2S, 3S, 4S, 5S, 6S.And the screen displays the corresponding battery icons,it means the full-charged status or low battery status.
Channel icon:It displays CH in 3D mode.If you uses <default> waveband setting in 3D mode,the screen will display RX1/RX2 waveband and channel information.But it simultaneously displays BAND and CH in 2D mode.
Transmitter Operation Instruction:
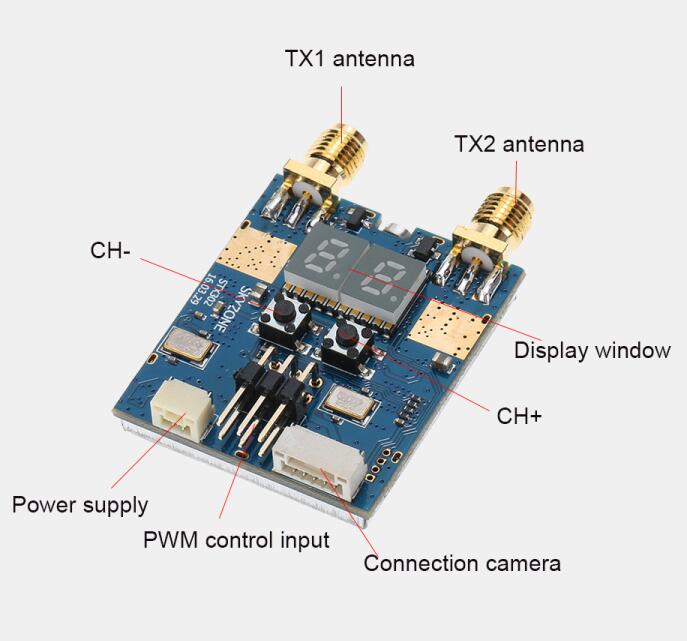
- Please carefully confirm whether the antenna port and transmitter port match when you assembling the antenna and make sure the device is fastened before connecting to power supply.Or,you may damage the transmitter because of antenna installation error.
The transmitter must be installed in a well ventilated place,you can not install it in enclose space or tightly package the transmitter.
- Please not touch the antenna and antenna metal parts durning operation to avoid affecting transmitter working.There is risk of burn injury for touching the antenna metal parts.
- STX202 has two bits LED display.When the preset channel mode displays channel,custom channel mode,the left one bit LED displays TX1 waveband and channel,the right one bit LED displays TX2 waveband and channel.Every time the power on default work is on preset channel mode,you can switch channels through button in this mode.There are four channel in total.
Long press or go to the custom channel mode,two bits LED will flash fast in this mode.And you first step into the waveband setting mode.You press the button and set TX1,TX2 waveband separately.Separately long press the button,you can sign out the waveband setting mode and go to normal working mode.You can short press at any time or press button to set channel.Simultaneously press the two buttons and you will switch from the custom channel mode to the preset channel mode.
- You can also use PWM signal to control the transmitter channel.
- Equip one three-grade switch on the remote control,C-H,channel+,C-L channel-.Connect the receiver one PWM channel to the STX202 S1 port PWM signal to control the channel in preset channel mode.
- In custom channel mode,connect the receiver another PWM channel to the STX202 S2 port.You need to equip with two three-grade switches on the remote control.The C-H adjusts waveband;C-L adjusts channel;S1 port controls the waveband and channel for TX1 ;The S2 port controls the waveband and channel for TX2.
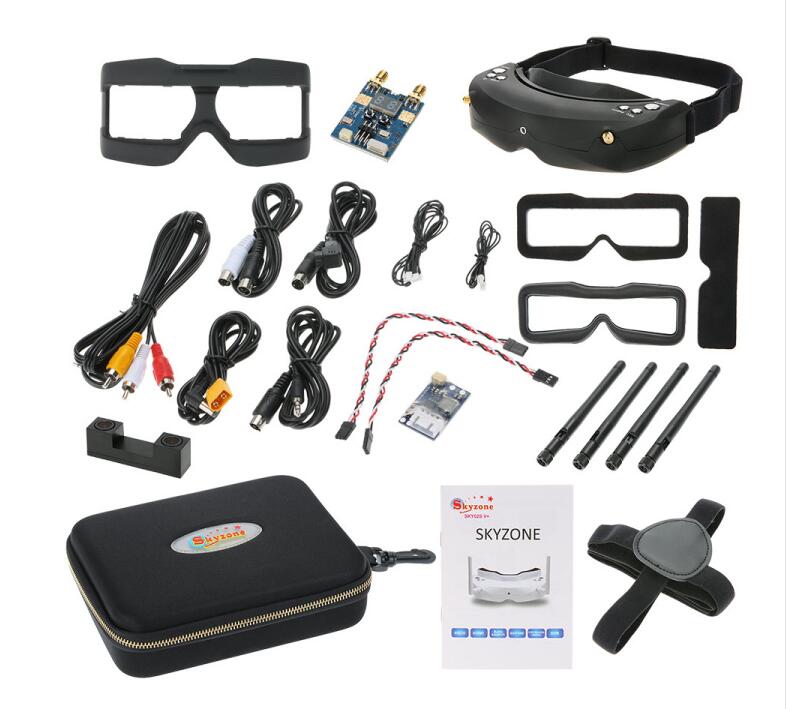
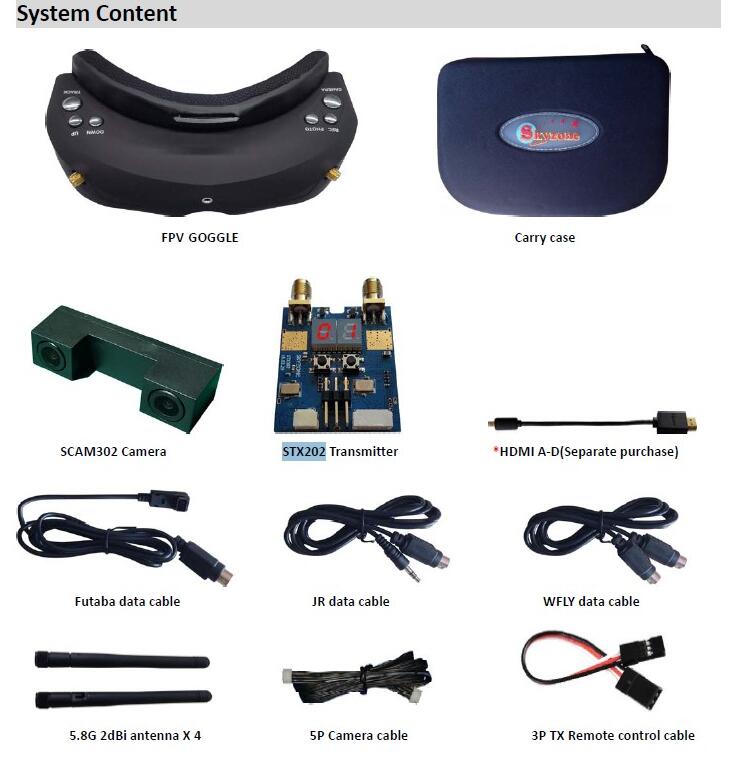
Package List:
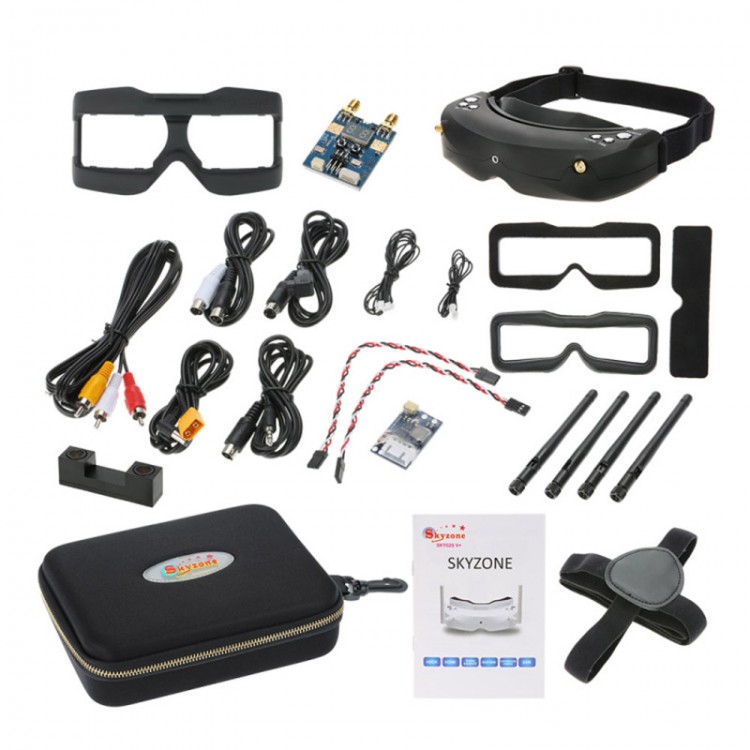
- 1 x FPV GOGGLE
- 1 x Carry case
- 1 x SCAM302 Camera
- 1 x STX202 Transmitter
- 1 x HDMI A-D (Separate purchase)
- 1 x Futaba data cable
- 1 x JR data cable
- 1 x WFLY data cable
- 4 x 5.8G 2dBi antenna
- 1 x 5P Camera cable
- 1 x 3P TX Remote control cable
- 1 x AV cable
- 1 x Power cable
- 1 x 2P TX Power cable